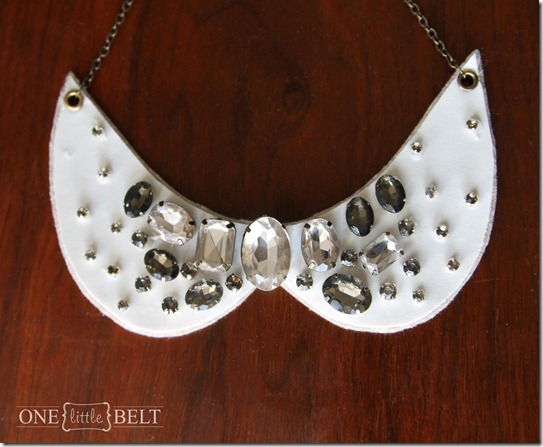
DIY Peter Pan Collar Necklace- Tutorial + Wholeport Review
This DIY has been on my list for months!! I love the Peter Pan collar trend and have been craving a faux collar of my own for a while. When Wholeport contacted me a while back, I knew I wanted to try out some of their jewelry crafting tools for this project.
Supplies: Cream/white fabric of choice (8”x6”)
Heavy weight fusible interfacing
Cream felt
13” of chain with lobster clasp
2 eyelets
beads, jewels, bling of choice
I started with an 8”x6” piece of off-white fabric and ironed it to my interfacing. I then traced my pattern on the wrong side of the fabric and cut it out.
The collar still wasn’t as stiff as I had in mind so I used some Fabri-Tac to fuse my collar to sheet of oatmeal colored felt. Next insert eyelets with an eyelet setter.
Trim the excess felt as you see fit and then attach a jump ring through each eyelet. 7mm is a good size. I considered using pearl or crystal beads for bling, but opted to take apart another necklace to use some oversized jewels. My tiny pliers and wire cutters worked perfectly for the job.
It took me a while to design my bling, but once I placed it all, I used fabric glue to attach them. I then attached my chain and adjusted the length for my neck and the look I wanted.
Ta-da!! The finished product! I love how it turned out. It makes such a statement and requires almost no other jewelry. I think it can easily be dressed up or paired with a basic tee and boyfriend jeans. My favorite necklines to wear with this necklace are crew neck or boat neck.
There are so many variations that I can think of for this DIY- pearls, lace overlay, satin, no bling at all- the options are endless. I’d love to hear how yours turns out!


